Marker light spacing and configuration is an easy topic to overlook, but it can have a big impact on your scene lighting package and the compliance of your apparatus.
What are marker lights?
Marker lights are identification lights designed to tell other motorists on the road that a large vehicle is ahead. And for a long time, fire apparatus manufacturers have been responsible for the spacing and configuration of marker lights. Manufacturers are required to follow Federal Motor Vehicle Safety Standard 108 (FMVSS 108), which defines where and how marker lights must be installed.
FMVSS 108 Standards for All MPV, Trucks, and Buses ≥ 2032 MM in Overall Width
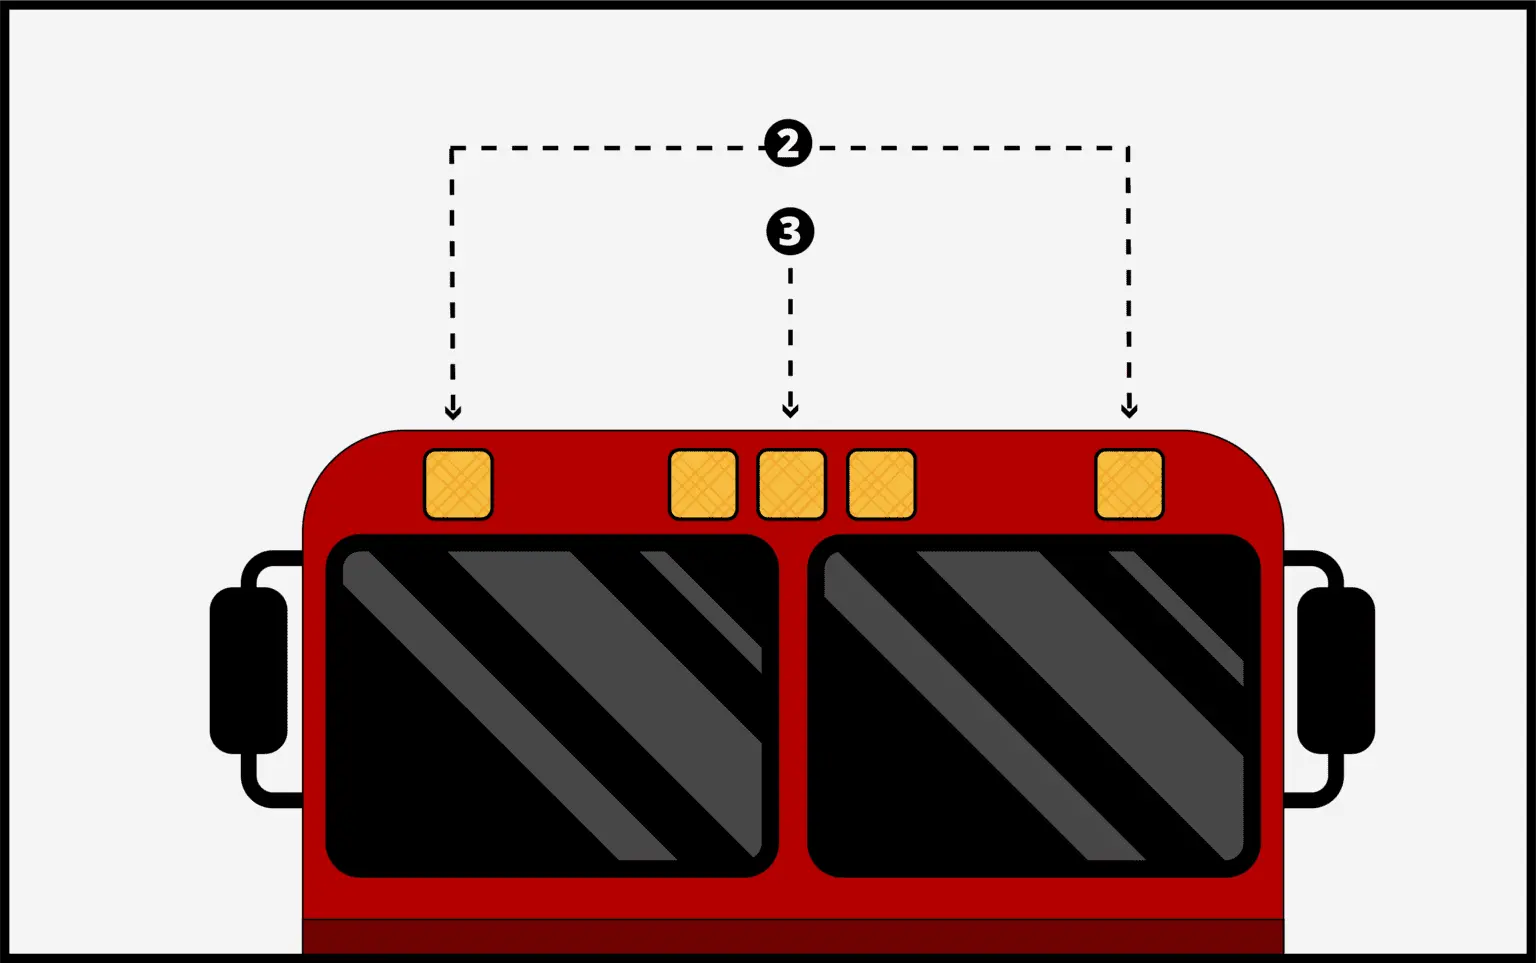
Clearance lamps 2 Amber On the front to indicate the overall width of the vehicle, or width of cab on truck tractor, at the same height, symmetrically about the vertical centerline May be located at a location other than the front if necessary to indicate the overall width of the vehicle, or for protection from damage during normal operation of the vehicle
As near the top as practicable Steady burning Identification lamps 3 Amber On the front, at the same height, as close as practicable to the vertical centerline, with lamp centers spaced not less than 6 inches or more than 12 inches apart As near the top of the vehicle or top of the cab as practicable Steady burning
In short, vehicles 2032 mm or more in overall width require marker lights in the following ways:
- Five marker lights on the front
- The outermost two are considered clearance markers
- The center three are considered identification markers
- These let other motorists know, “Hey, a big vehicle is ahead!”
- These are always a set of three (not four, not one, not two—three)
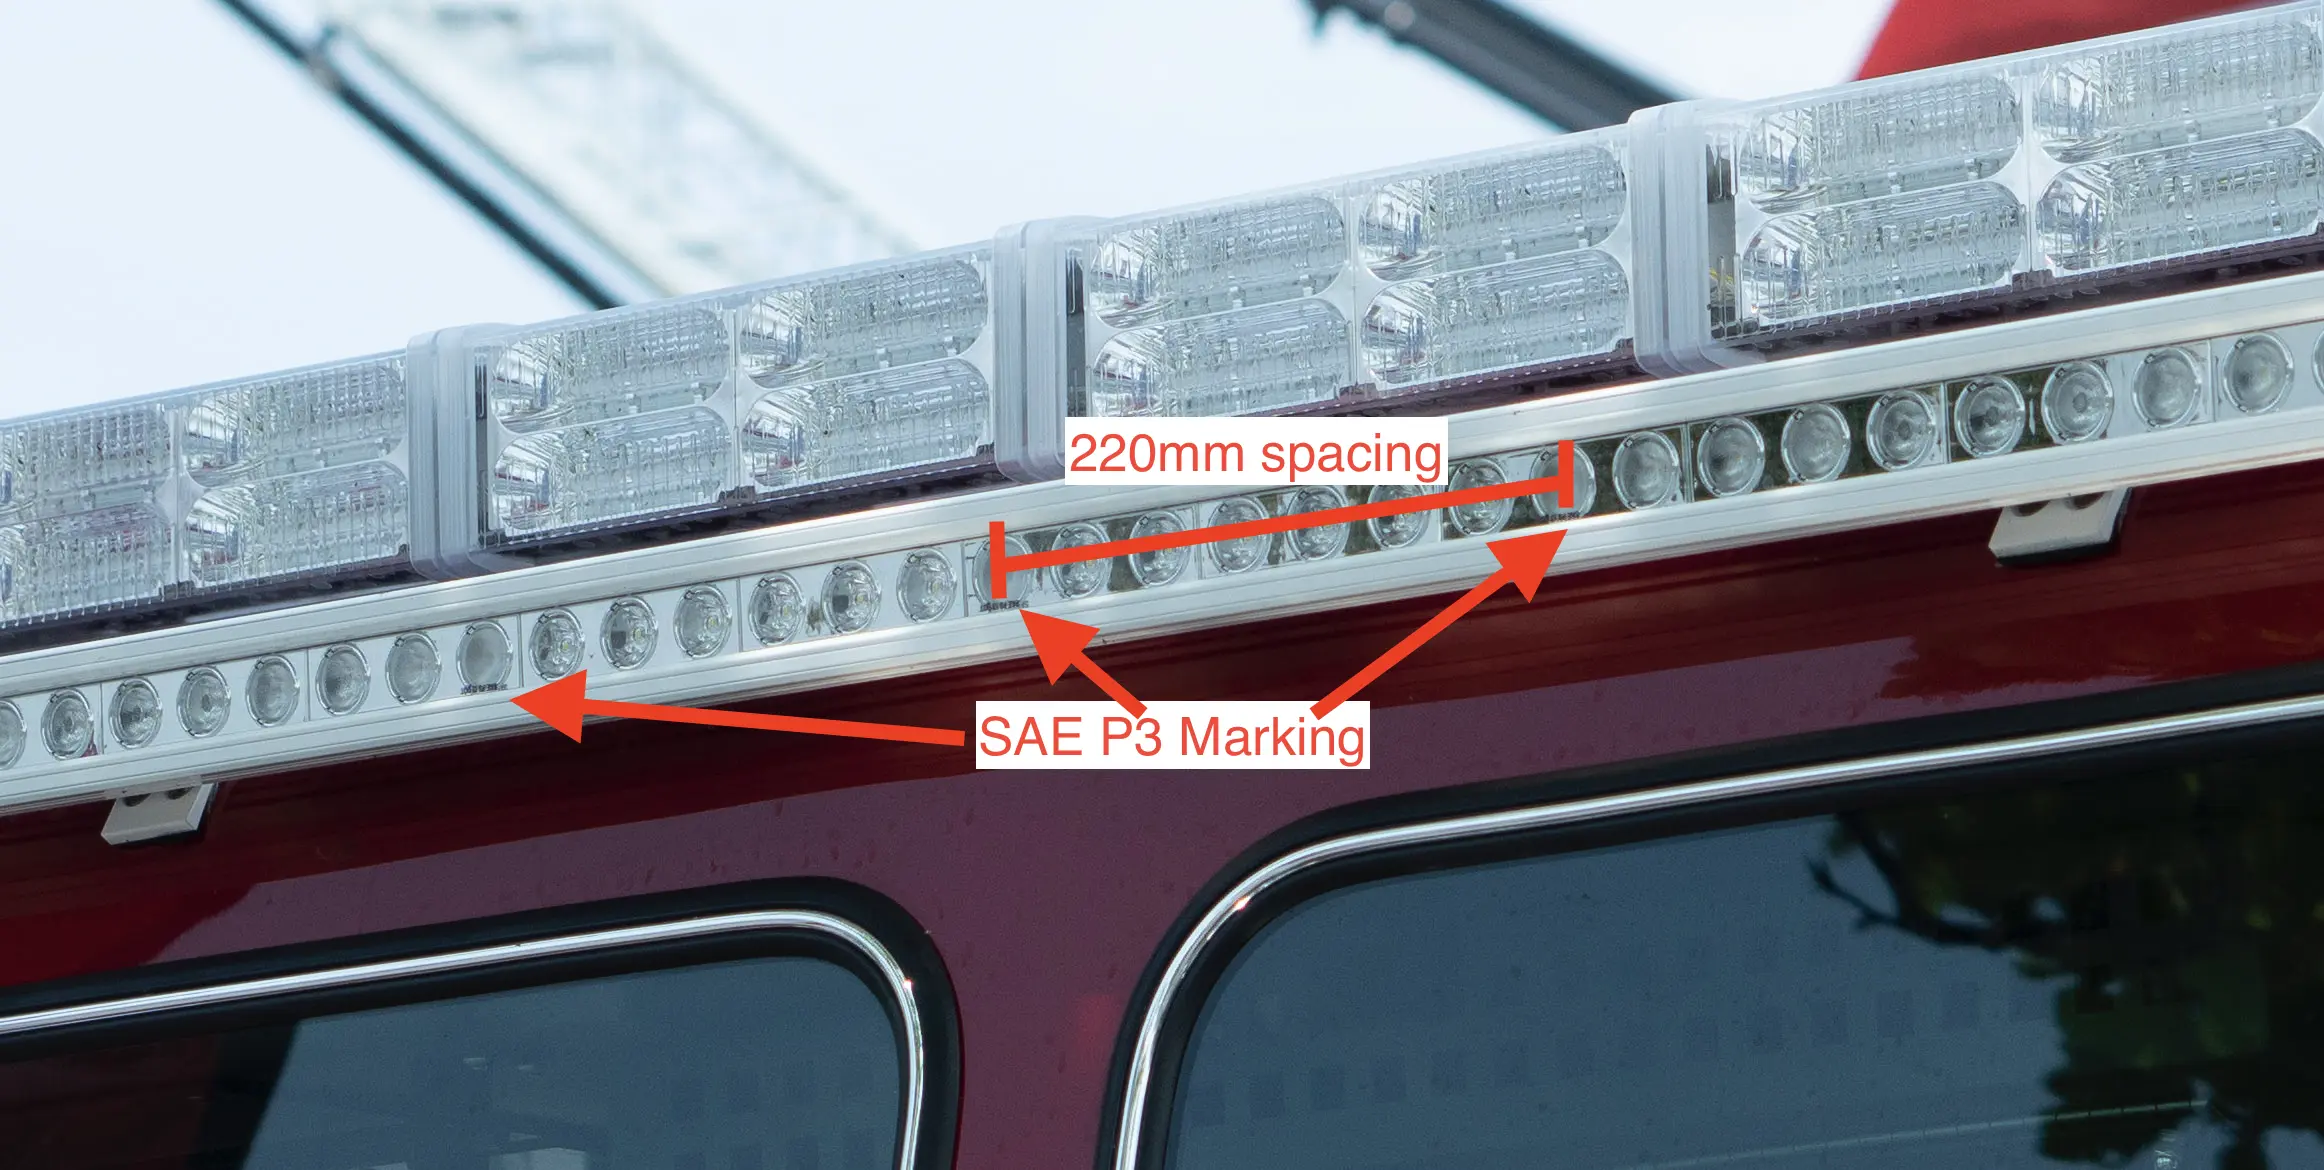
- They must be spaced between 6 and 12 inches apart
- They must be amber if they’re forward-facing and red if they’re rear-facing
- They must be on the same plane (mounted side by side, in a straight line—not broken up or bumped out)
- They must be marked SAE P2 or SAE P3 to designate the type of light they are
- They must be photometrically verified to be in compliance with SAE J2042
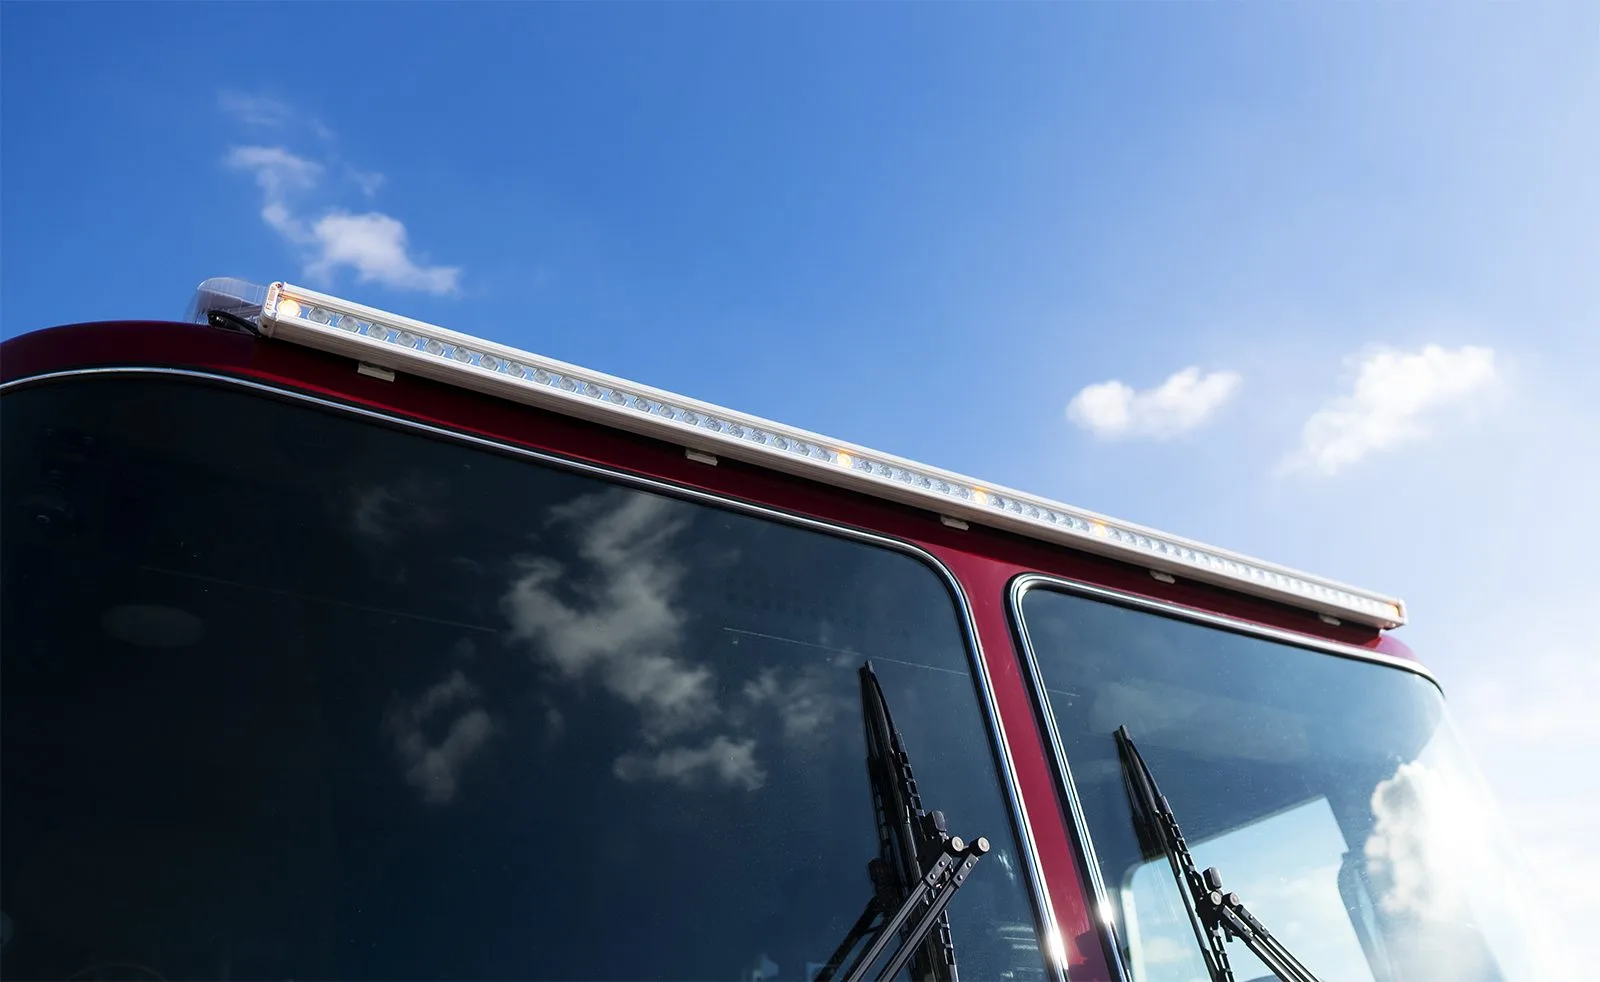
This can make the installation of forward-facing scene lights a challenge. In 2012, we wanted to install a linear extruded scene light on the face of an apparatus cab. We couldn’t do it because the marker lights were in the way. We thought about installing the LED scene lighting on the roof of the cab, but roof mounting causes shadowing, which we want to avoid. We developed a bracket to hang the light over top of the marker lights, and this worked fine – but, because it could have obstructed view of the marker lights, it wasn’t ideal. Finally, we reached out to our engineers to figure out how to integrate marker lights into our brow light on a different circuit.
FireTech Emergency Vehicle LED Brow Lights
After some work with engineering, we came up with a linear driver that allowed us to group our LEDs in configurations other than threes for our driver circuit—and the FireTech Brow Light with integrated marker lights was born.
Still, there were some concerns that the FireTech Brow Light would be considered an optically combined fixture and therefore not allowed by National Highway Traffic Safety Administration (NHTSA) standards.
A quick note about optically combined vs. optically grouped
Optically combined means two fixtures share a common optic – or, in other words, one optic with two uses.
In an optically grouped fixture, two independent fixtures with independent optics and independent LEDs/drivers share a common housing. In other words, each optic has only one use, but multiple optics share the same housing.
The FireTech Brow Light is optically grouped, not optically combined. This allows the marker lights to retain their identification function whether or not the scene lights are in use.
There were also concerns about an interpretation of NHTSA guidelines that prohibited mounting auxiliary lights next to marker lights. It’s important to note that in NHTSA standards, auxiliary lights have to be qualified as auxiliary to what. Since scene lighting is considered auxiliary lighting on the apparatus, some have incorrectly thought this interpretation applies to scene lights. However, the interpretation was referring specifically to additional (or auxiliary) marker lights.
The interpretation explained
If you put a bunch of extra marker lights next to your three ID marker lights, this would interfere with the intended visual signature laid out by the guidelines and invalidate the identification function.
Placing scene lights next to marker lights doesn’t interfere with their visual signature, however. Scene lights can’t be mistaken for marker lights, so the two amber clearance lamps on each side and three evenly-spaced amber identification lamps in the center would still be clearly visible.
Therefore, extra marker lights wouldn’t be allowed, but scene lights mounted next to your marker lights would be.
What we’ve learned about marker lights in the emergency vehicle lighting industry
Because of the research we put into developing our integrated marker lights, we learned that there are a lot of things the industry commonly gets wrong. Trends we’ve seen that don’t pass regulations include:
- Mounting a scene light in the middle with two marker lights on each side
- Building a tray and pushing the center marker light on onto the tray
- Mounting the light to the cab and pushing the center light down onto the face
- Covering the center marker light altogether
- Improper or missing markers
- Improper optical spacing, with markers too close or too far apart
We developed the FireTech Brow Light to be the best solution to this issue, seamlessly grouping your scene and marker lights into one FMVSS 108 and SAE J2042 compliant fixture that eliminates the need to find complicated work-arounds.
Speak to an experienced LED scene lighting consultant
Have more questions about this topic, or about LED scene lighting in general?
Visit us at facebook.com/scenelighting, or contact us.


